Clay at home
We developed our clay at home scheme during the covid lockdowns. Although nowadays most people choose to come to the studio, using clay at home is still a great thing to do, particularly if you want to work with the clay at the "leatherhard" stage.
Making pottery is a fantastic and fun thing to do! Why not buy some clay from us and take it home to use? The price includes firing in our kiln. We have put a series of instructional videos on YouTube.
Making pottery at home is a lovely activity that can be enjoyed by adults and children of any skill level. Share the clay or have it all for yourself—but whatever you do, enjoy it!
Scroll down for details of painting on ready made items at home.
There are two stages to making ceramics at home
Most people who do stage one (making) at home come to the studio for stage two (glazing).
Stage One: Make some great things out of clay and then bring it back to the pottery after it has been drying for two weeks. We will do the first firing in the kiln. Click here for our YouTube video about using clay at home.
Stage Two: After the first firing the clay is ready to paint with glaze. You can book a glazing lesson if you need help, or studio time if you want to use the studio (and glaze) independently.
NB There’s no pressure to continue on to stage two after the first firing—you could leave your creation white or decorate it with whatever you have at home. But if you want the full effect (and for it to be waterproof) you’ll need proper ceramic glaze.
Stage One: Clay at home £18
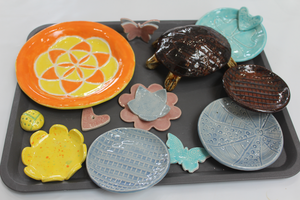
Take a ball of clay home for £18—the price includes firing in our kiln. This picture will give you an idea of how much you could make with the clay we’ll give you, but you can make anything you like!

Tools for using clay at home
You will find that your kitchen cupboards and toy boxes will probably provide all the tools you need!
The minimum tools required to make pottery at home are…
A board to roll clay on— clay will stick to tables and messy mats so you will need to roll on fabric—something like a pillow case will work well. It’s important that the fabric is not fluffy as you don’t want bits to stick to the clay. The fabric needs to be taut and flat (like an ironing board) so you don’t roll creases into your clay. Although an ironing board would work perfectly, we’re not recommending it as you’ll never be able to iron again!
A rolling pin—a wooden roller is best. If you are using a rolling pin from your kitchen its very important that it’s clean. You may not discover that the clay has been contaminated until something dramatic happens in the kiln! Vice versa clay is really not a recipe ingredient.
A box to store clay in to stop it drying out—with damp cotton wool. Our YouTube video explains it best.
A knife and a brush—the kind of blade on a dinner knife, not too sharp or serrated is best for cutting wet clay. A paint brush, not too soft, will be good for putting a little water onto pieces of clay that you are joining together.
You will also find that any of these will come in handy:
Paper plate and bowls (or small bowls with paper towels or cling film)
Cookie cutters—make sure your smallest finger fits in the cutter so you can push the clay out without stretching it.
Scratching tools
Something clean and flat to put your finished articles on while they dry
Follow these links for advice about storing clay and rolling clay.

Tool kits
During Lockdown we offered tool kits to hire. This is no longer available as we are back to needing our stuff in the studio!
However, we thought it would be helpful to keep the lists here of what was in the kits to help you plan the equipment you need for your own home studio...
1. Basic kit
Wet box (for storing clay)
Board for rolling clay on
Wooden rolling pin
Knife and Brush
Plus free gifts (non returnable!)..
6 paper bowls, 2 paper plates, 2 .cocktail sticks
2. Accessory kit
Textured roller
Pottery Rib (for smoothing)
2 circle cutters (13cm and 11cm)
2 heart cutters
1 star cutter
3. Extra Accessory kit
Fine patterned roller
5 assorted shape (cookie) cutters
2 circle cutters (8cm and 6.5cm)
Flower cutter
Ball tool
After the clay has had its first firing it will be white and much stronger. At this point you could just leave it, or paint it with your own paints at home. However, you may decide to move on to Stage Two.
Glaze options during Studio Time
Underglaze
There are lots of colours available. You can mix them if you want to. Underglaze acts very much like normal paint and needs a transparent glaze over the top
Glaze
There are lots of choices for these more traditional glazes—examples are on our youtube channel. We use Amaco Potters Choice and Amaco Celadons. You can’t mix these glazes but you can paint them in layers. Click here and here for our YouTube videos about glazes.
Scroll down for details and tips.
1. Underglaze
We use Amaco’s Velvet underglaze. They work very like other paints. You can even mix them to make new colours.
To make the colours strong and not to see your brush strokes, paint three coats—allow each coat to dry before the next one goes on. Lumps and bumps of glaze don’t work well—try to paint even and thin layers.
Don’t paint underneath your object. If any glaze touches the kiln shelf it will melt and as it cools it will set and your piece will be stuck FOREVER!
We use two heat settings for underglaze - the lower temperature will leave the white bits more white and teh colours brighter but your piece will be decorative and not functional ie it won't be waterproof. The higher heat setting makes the pottery fully glazed and waterproof (unless there are holes of course!) but the clay is darkened a bit in the hot kiln so you may want to paint white bits with a white underglaze. It's usually best not to leave any bits unpainted (except the bottom of course!) - unless it’s part of your design—random bits of unglazed pottery on ceramics don’t look good.
2. Glazes
We use Amaco’s Potter’s Choice glazes. These are more traditional in their look than the underglazes and there are more things to consider. Nevertheless, with a bit of thought you can get great results. There are lots of options—examples are on our youtube channel. It’s important not to mix these glazes—but you can paint them in layers for interesting results.
Some of our glazes “break” over texture and some even look like you painted two colours when you only painted one! Watch our YouTube video to make your choice.
Paint three coats—allow each coat to dry before the next one goes on. Some colours work well in layers but others look terrible! The Amaco website has examples (but be careful as we don’t have all of the hundreds of glazes they make). We have a video on our website showing our favourite layering.
Lumps and bumps of glaze don’t work well—try to paint even and thin layers.
Don’t paint underneath your object. If any glaze touches the kiln shelf it will melt and as it cools it will set and your piece will be stuck FOREVER! Remember that glaze can run and if a run sticks to the shelf your pottery will be destroyed.
Make sure you don’t leave any unpainted gaps.
The Amaco Celadon range are glazes that often are very good on textured surfaces - bringing out the patterms rather than covering them over.
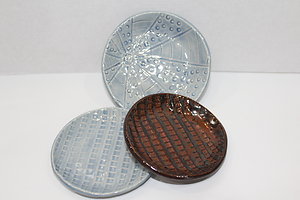
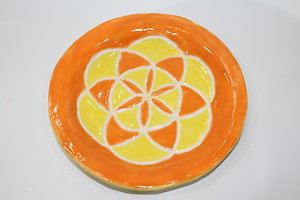
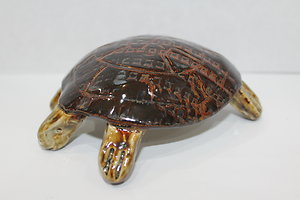
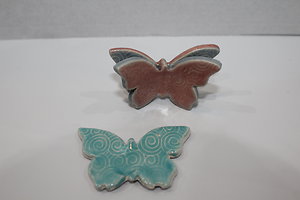
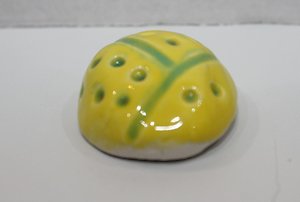
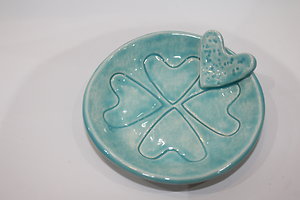
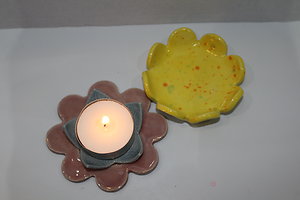
How much can you make with one clay kit?
The pictures below are close-ups of everything we made with one clay pack and glazed with one glaze pack. You can see that there's plenty of clay in one kit whether you want to share or have it all to yourself!

Notes about Painting on Ready Made Pottery
1. Clay that has been fired once but not yet glazed is called 'bisque'.
2. When painting on ready made bisqued items, it is best to paint three layers of each colour. Try to keep the paint layers even and not lumpy - lumps of glaze can react in the kiln and make pinholes or blisters.
3. It's fine if you leave bits of the bisque on a ready-made piece unpainted as we will be adding a layer of shiny transparent glaze so any unpainted bits will become shiny white.
4. Click on this link to look at our underglaze colours.
Paying for Clay at Home
There are several ways to pay:
* Phone us on 07721988686 to pay by card.
* Post a cheque or put an envelope with cash through our letterbox. It is essential you include your name so we know who paid.
* Pay directly into our bank account,
please use your name as a reference so we can identify your payment:
milndavie pottery
sort code 826932
account no 50105403
